

 Pipe threading machine
 Portable Pipe Threader
 Professional Stationary PipeThreading Machine
 Economy Stationary Pipe Threading Machine
 Threading spare parts
 Pipe grooving machine
 pipe cutting machine and tool
 Pipe cutting machine
 Hole cutting and drilling
 Hinged pipe cutter
 Rotary Pipe Cutter
 Pipe drain cleaning machine
 Pipe installation tools
 High pressure washing machine
 Pipe beveling machine
 Pipe bending machine
 Plastic welding machine
 About HL
 Company Certificate
 Company Team
 OEM Service
 FAQ
FAQ Video Center
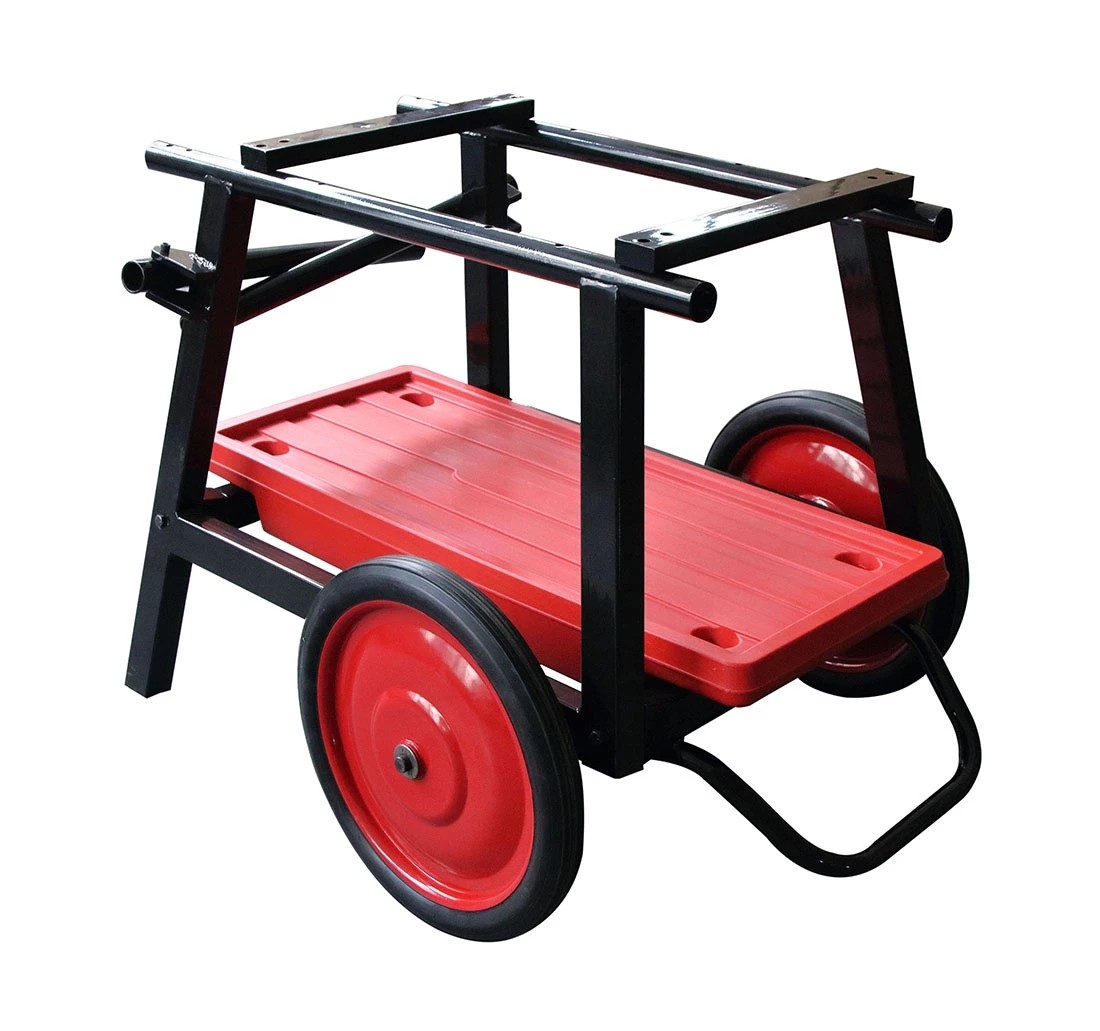
How to Install 672A carriage
672A Stand Installation Instruction
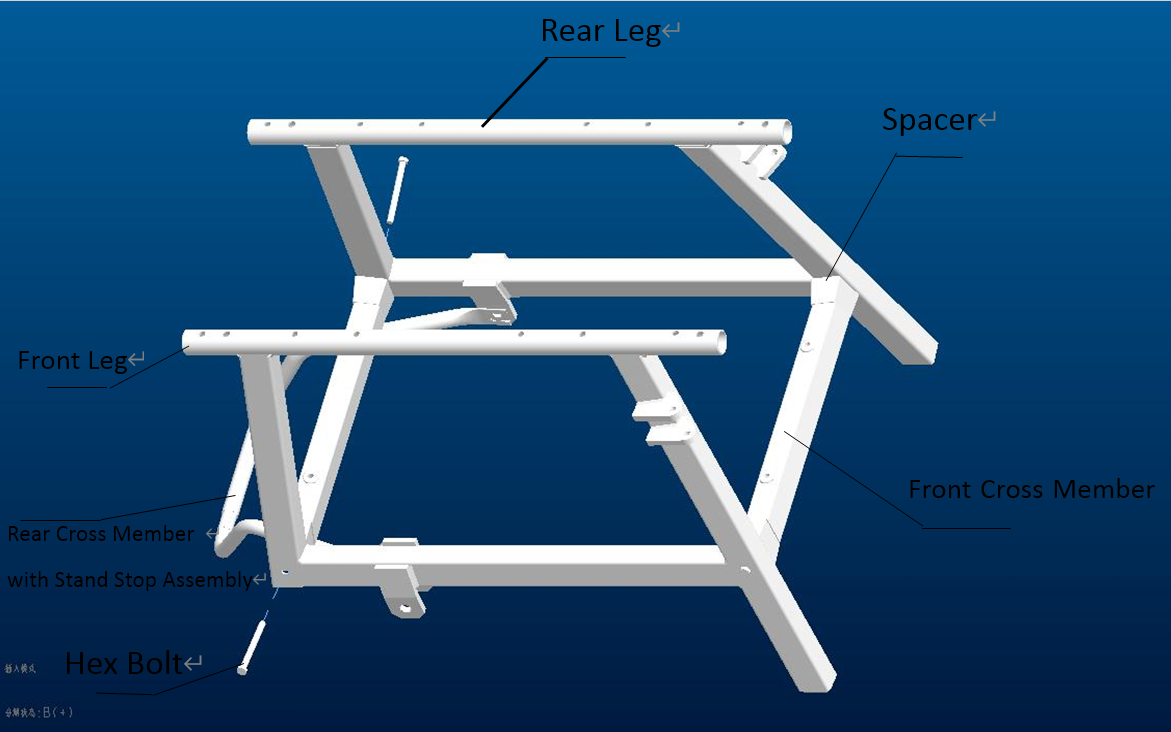
Step 1 Legs Installation
Fix the Rear Leg and the Front Cross Member with the spacer and the Hex Bolt of UNC3/8x4″b=30. Then fix the Rear Cross Member with Stand Stop Assembly to the Rear Leg with the spacer and the Hex Bolt of UNC3/8x4″b=30 as well. Then fix the Front Leg in the same way.
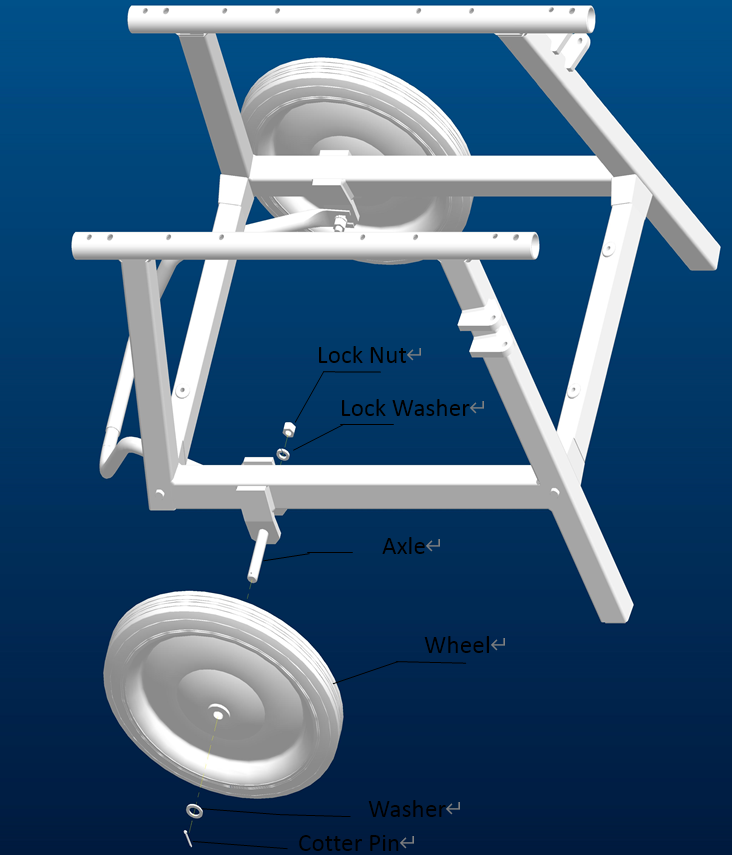
Step 2 Wheels Installation
Firstly, Fix the Axle to the Front Leg with the Lock Nut and the Lock Washer as the above picture shows. Put the wheel to the Axle, put the washer and then lock the wheel with the Cotter Pin. Then, lock the other wheel in the same way.
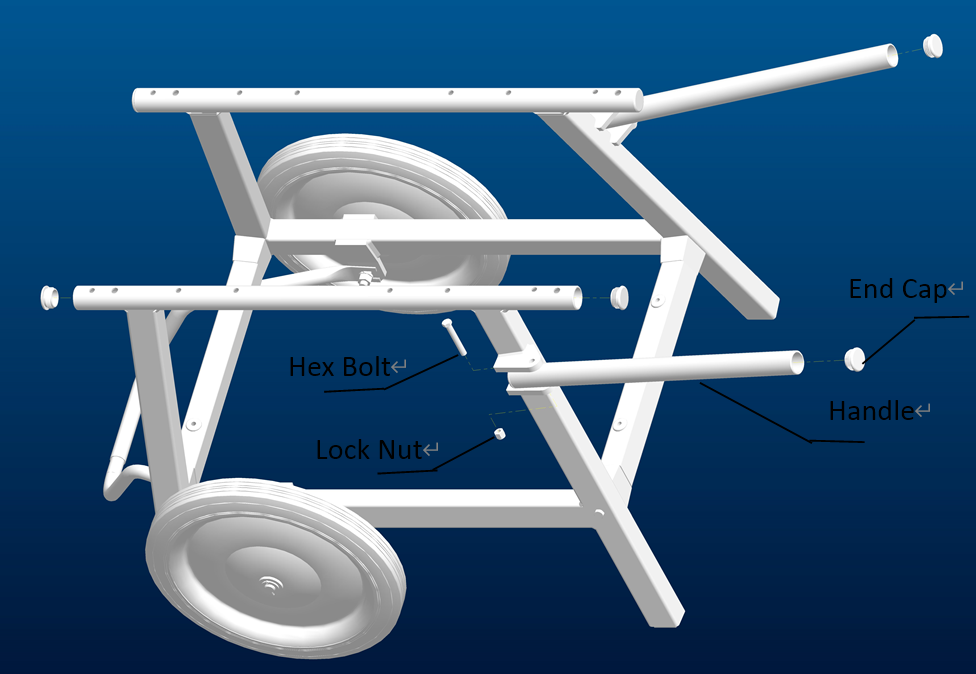
Step 3 Handle Installation
Put in the Handle to the Front Leg as the above picture shows. Lock the Handle with the Lock Nut and the Hex Bolt. Then install the other handle in the same way. Put in the End Cap to the handle at last.
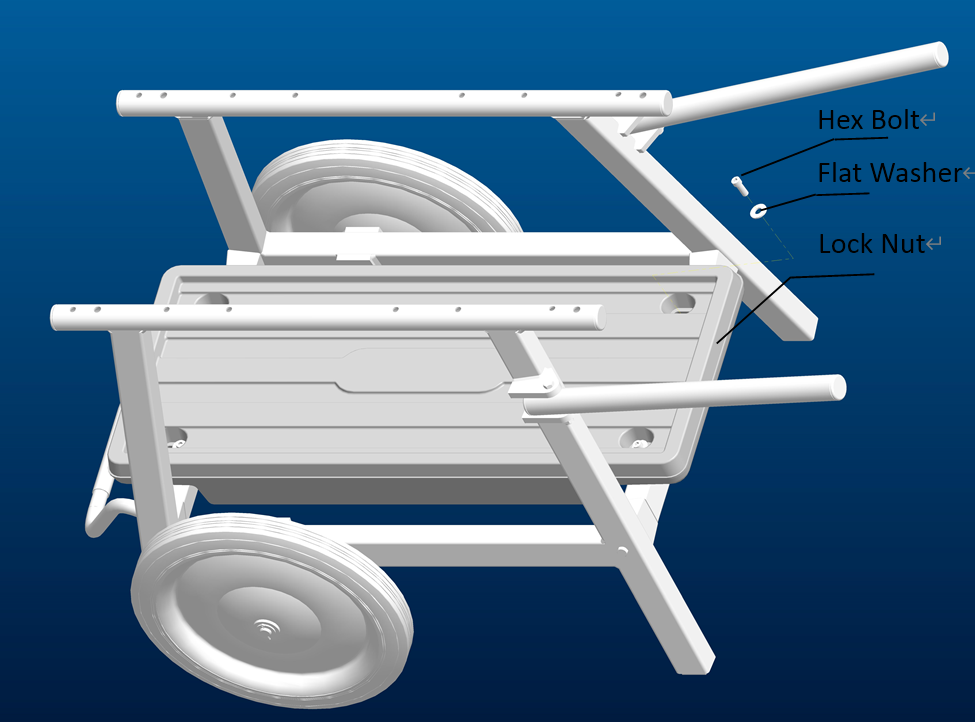
Step 4 Tray Installation
Put the tray into the cart as in the above picture. Aligning the corresponding holes and then put in the Flat Washer, then lock with the Hex Bolt. Lock all the four bolts in the same way.
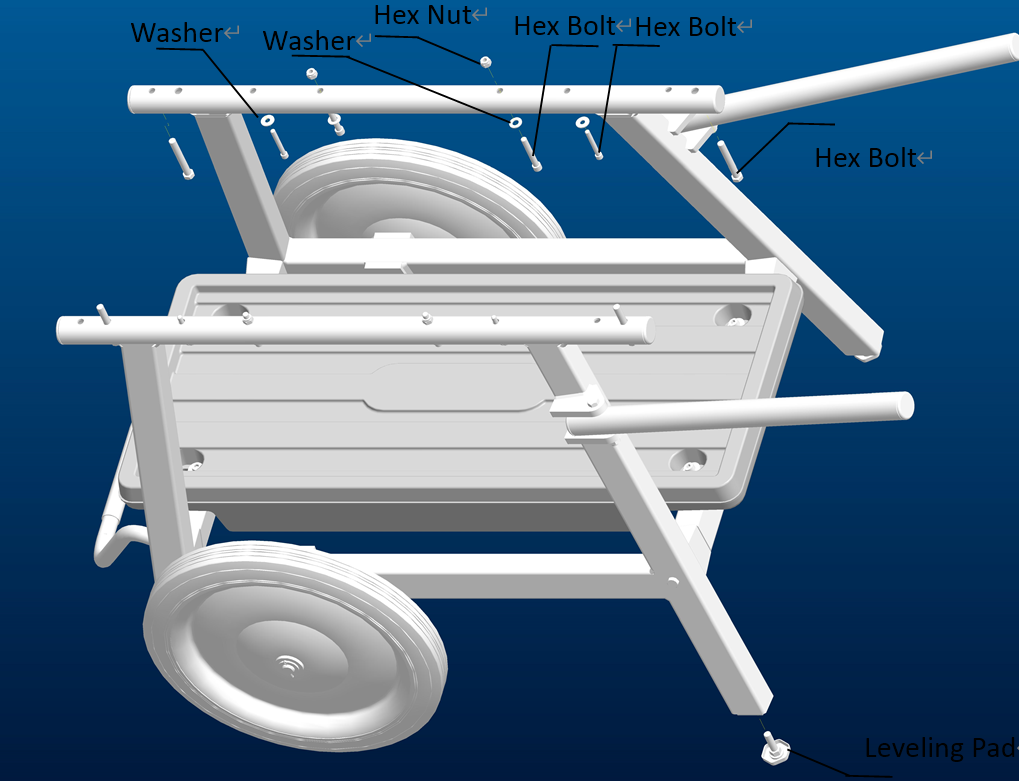
Step 5 Fixing Bolts Installation (The bolts are selectively used as per the machines you want to match)
Fix the Hex Bolt of UNC3/8x2 3/4″b=30 to the right end hole of the Rear Leg as the above picture shows. Fix the Washer of 1/4 together with the Hex Bolt of UNC1/4x50 b=27 to the third hole from the right end of the Rear Leg as the above picture shows. Then put the Washer of 5/16 together with the Hex Bolt of UNC5/16x56 b=30 to the fourth hole from the right end and fix by the Hex Nut of 5/16. Fix the left end holes and bolts of the Rear Leg in the same way as the picture shows. And also fix the holes and bolts(specifications same with the ones on the Rear Leg) of the Front Leg in the same way. After fixing all the bolts in both the Rear Leg and the Front Leg, install the Leveling Pad to the right end of both the legs as the picture shows above. Then the installation of 672 stand is finished.
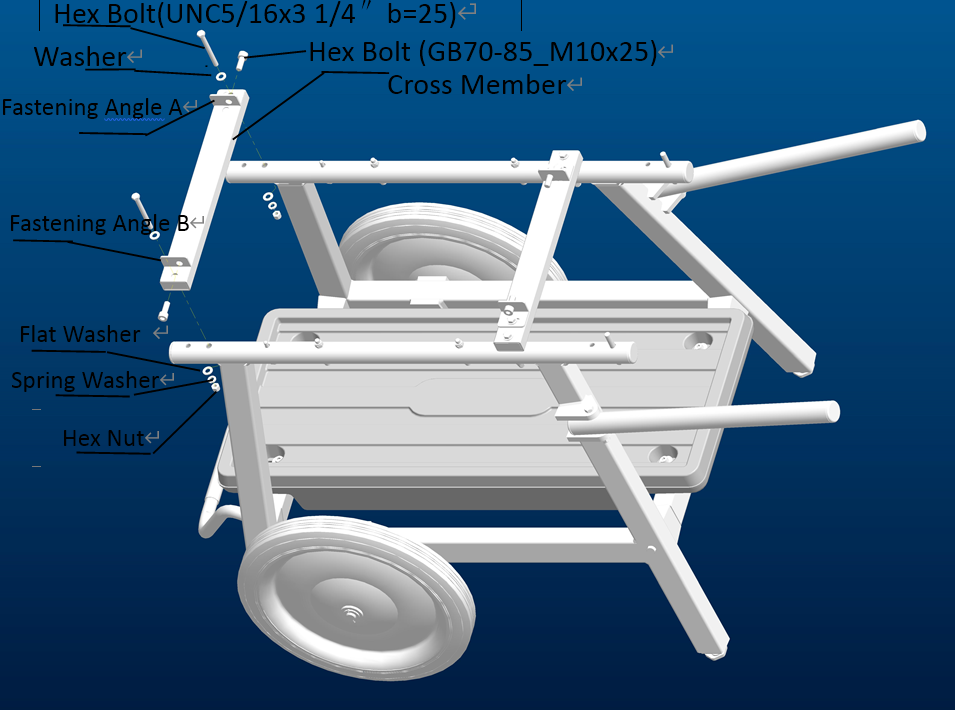
Step 6 672A Stand Installation
Take off some bolts at the basis of last step as the picture shows here. Put in the Cross Member to the finished 672 stand as the picture shows. Fix the Fastening Angle A to the Cross Member. Put the Washer of 5/16 together with the Hex Bolt of UNC5/16x3 1/4″b=25 and the other end with the Flat Washer of 5/16, the Spring Washer of 5/16 and the Hex Nut of 5/16 to fix the Cross Member to the Legs. In a similar way put the Fastening Angle B to the Cross Member and fix to the Legs. Then
put in the Hex Bolt of GB70-85_M10x25 in the hole as the picture shows, be ready to fix machine.
Then fix the other right hand Cross Member in the same way as the picture shows. The corresponding bolts and Fastening Angles are with the same specifications.
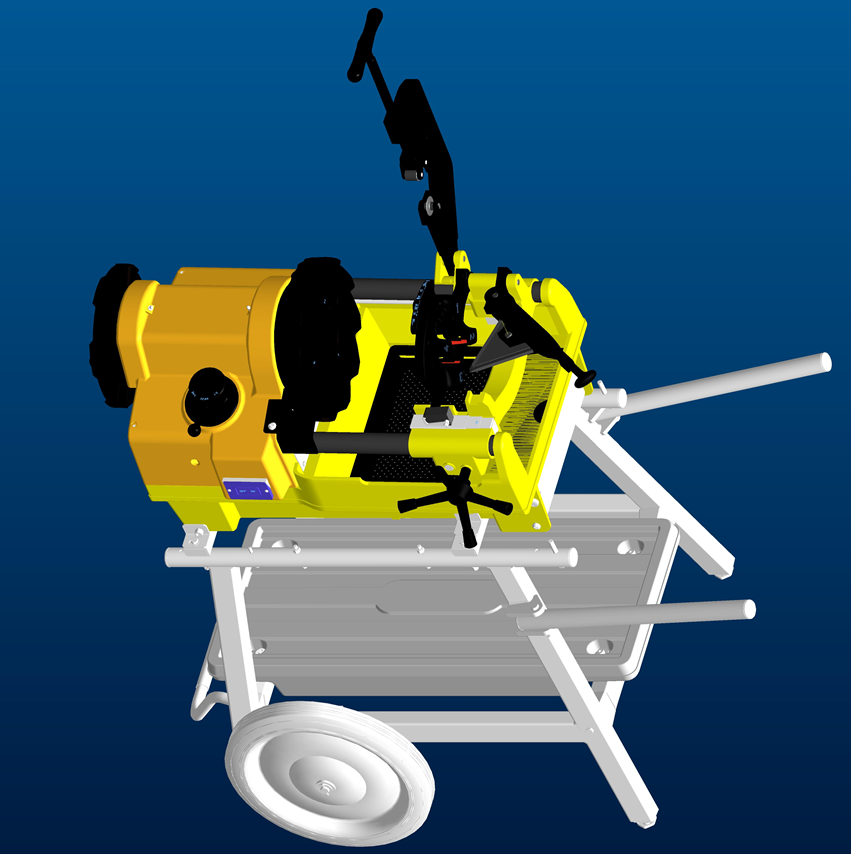
Step 7 Machine Installation
After 672A stand installation, put on the machine to the Cross Member and fix the bolt.